Warning
You are reading an old version of this documentation. If you want up-to-date information, please have a look at 2025.11 .Replacing the purge kit actuator
Important
Before replacing the actuator, unplug the purge actuator kit from the Asycube, remove the platform and remove the actuator kit.
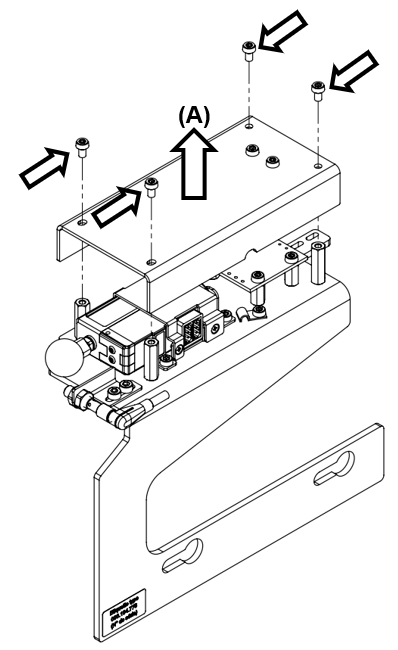
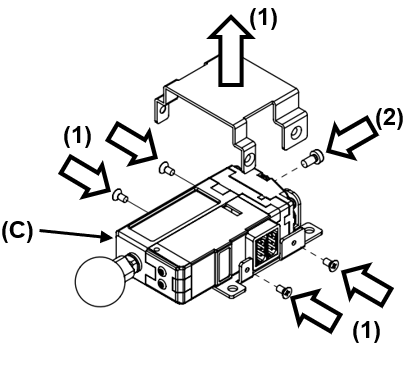
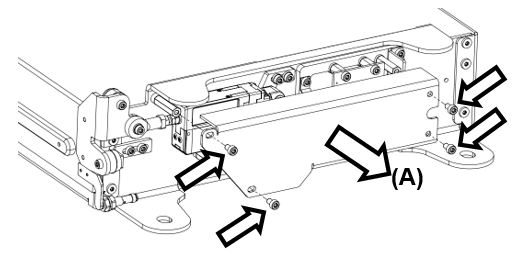
Step 1:
Remove the protective cover (A):
4 screws Tx10. 
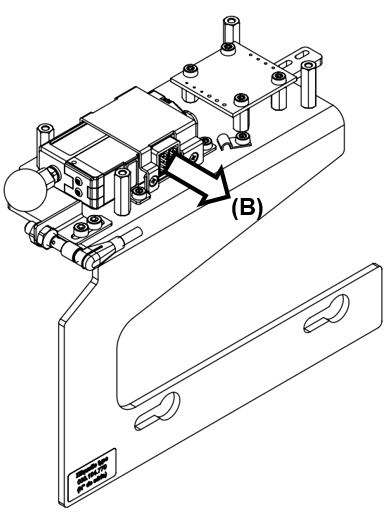
Step 2:
Disconnect the actuator by pulling on the connector, and not on the cable itself (B).
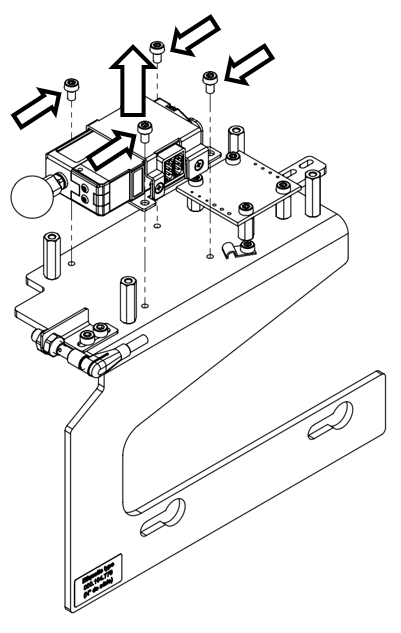
Step 3:
Unscrew the actuator block:
4 screws Tx10
Step 4:
Unscrew and open the support (1):
4 screws X0. 
Unscrew the actuator (2):
1 screws Tx8.
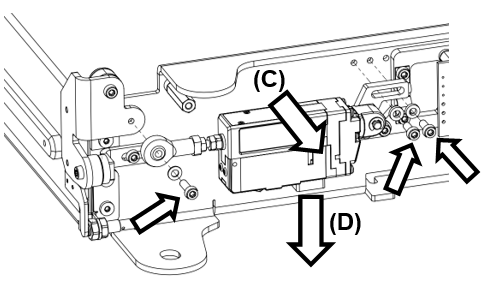
Swap out the actuator (C).
Step 5:
Screw back the actuator in the support (1):
1 screws Tx8 - 0.8Nm.
Close and screw support (2):
4 screws X0 - 0.6Nm.
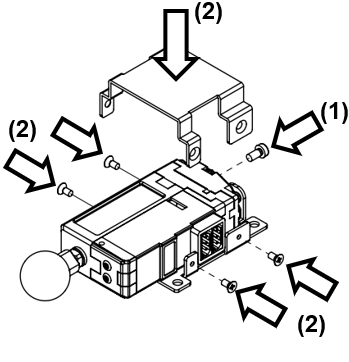
Step 6:
Screw back the actuator block on the main plate:
4 screws Tx10 - 1Nm
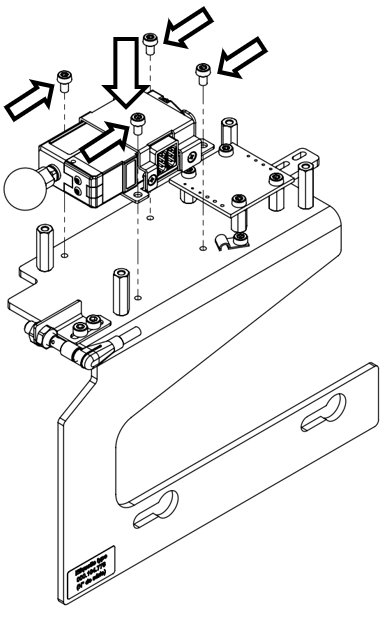
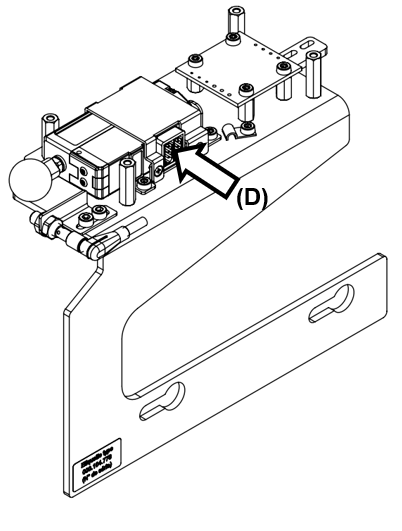
Step 7:
Plug in the actuator (D).
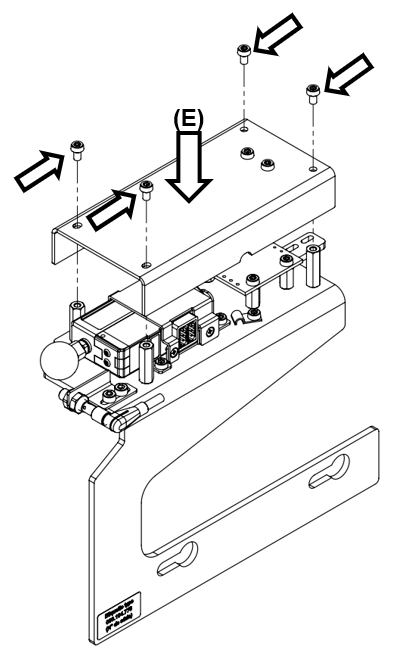
Step 8:
Screw the protective cover (E) back into position:
4 screws Tx10 - 0.6Nm.
Step 1:
Remove the protective cover (A):
4 screws Tx10.
Step 2:
Cut the zip-tie without damaging the cables.

Step 3:
Unscrew the motor block:
3 screws Tx10
Remove the motor (C) and disconnect it by pulling on the connector, and not on the cable itself (D).
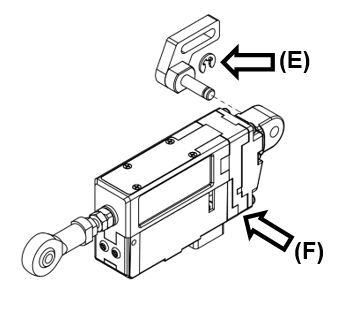
Step 4:
Remove the retaining-ring (E).
Swap out the motor block (F).
Reposition the retaining-ring (E).
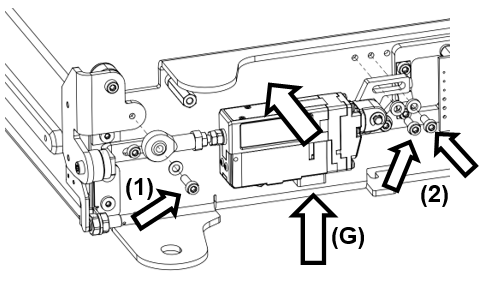
Step 5:
Plug in the motor block (G).
Tighten the flap screw (1) (hold the flap in the closed position while screwing in).
Screw in the bracket (2) with the flap still in held in the closed position.
3 Tx 10 screws / 1.2Nm
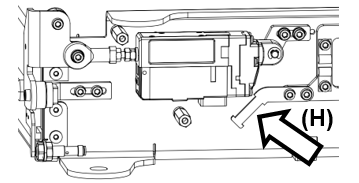
Step 6:
Tie the cables together with a zip-tie (H).
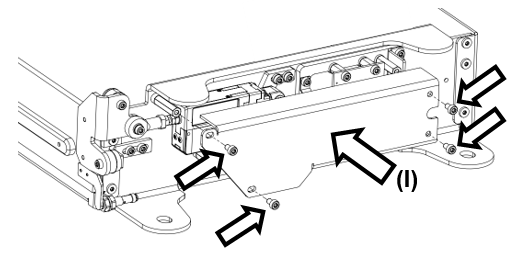
Step 7:
Screw the protective cover back into position (I).
4 Tx 10 screws - 0.6Nm