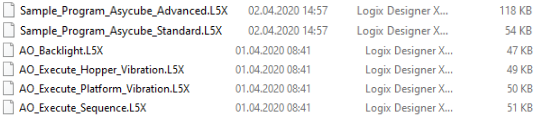
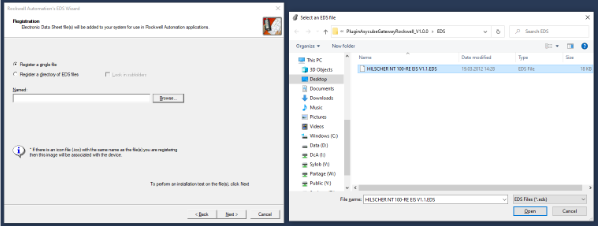
The plugin is delivered in a .zip folder. Unzip it and you will find a folder containing the files/programs
displayed on Fig. 175 and the EDS file for this Gateway.
We recommend you working with the sample program Sample_Program_Asycube_Standard which contains everything that is
necessary to implement the scenario introduced in Integration examples. An example of integration of
the other AddOns is described in the Sample_Program_Asycube_Advanced.
To import a sample program, right click on your task, select Add and choose Import Program…. You will still
have to link the Gateway Controller Tags to your AO as described in Link I/O.
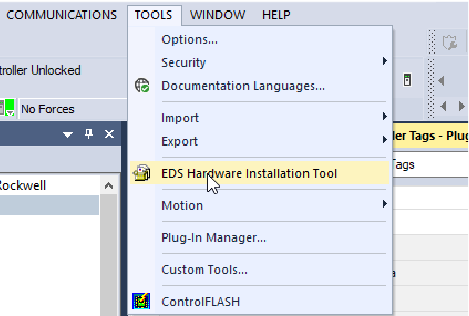
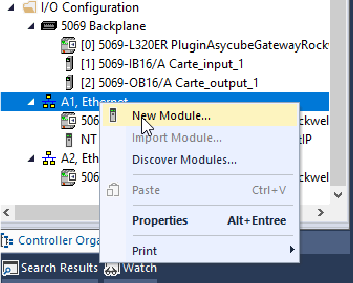
Should you want to make a customized integration of the AddOns, you can import them separately by right clicking on the
Add-On Instructions folder and choosing Import Add-On Instructions.
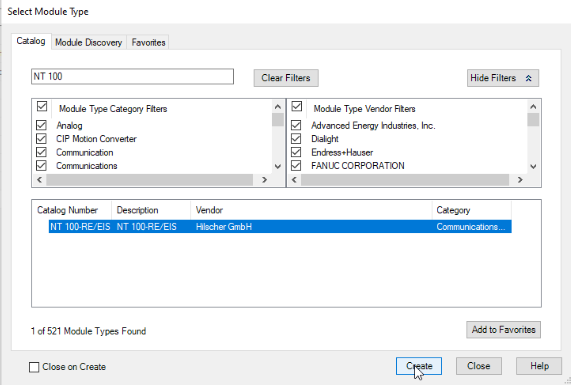
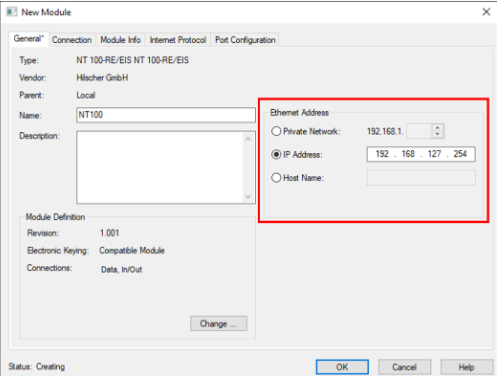
Select the Gateway and press Create. Write NT100 in the search area to find the Gateway. Should you have
several Gateways, you will have to redo step 6 to 7 several times.
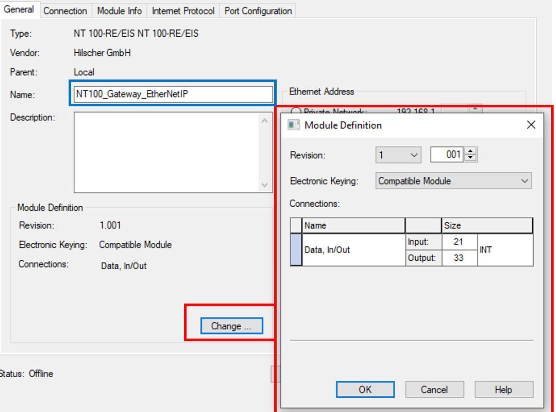
In the tab General, press on Change … and configure 21 Inputs (INT) and 33 Outputs (INT). You can modify
the name of the Gateway (in the blue rectangle). This name will be used as reference in the Controller Tags.
Note
Should you have several Gateways, each of them must of course have a different name.
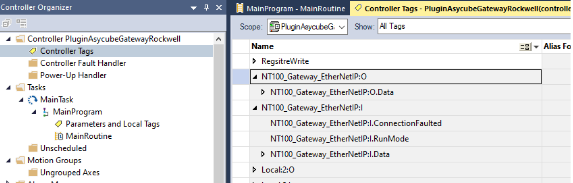
Once the gateway has been successfully integrated in your project, you will be able to retrieve the registers (data) of
the gateway in the Controller Tags. These registers can then be linked with the I/O from your AO
regAsycubeWritePIO and regAsycubeReadPIO as shown in the next section.
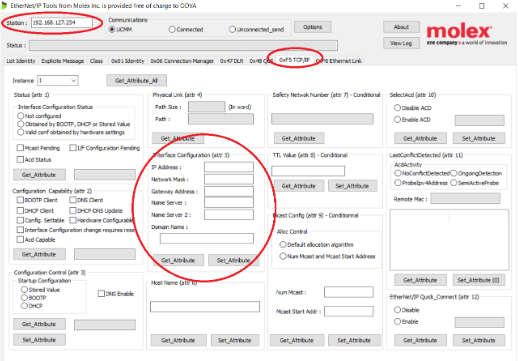
Change IP of the Gateway (If several Gateways are connected to the same PLC)
An Ethernet/IP fieldbus slave (Adapter device) is identified on the Ethernet/IP network based on its IP Address. The IP
Address of the Ethernet/IP Asycube Gateway is set by default to 192.168.127.254. If several Gateways exist in the
same Ethernet/IP network, the IP Address of some Gateways needs to be modified. Some dedicated tools can persistently
modify the IP Address of the device, such as the Molex Industrial Communication Competence Center (ICCC) EtherNetIP
Tool.
Fig. 186 Molex Industrial Communication Competence Center (ICCC) EtherNetIP Tool
Note
Please note that the IP Address persists even if the Gateway configuration is reset to the factory settings.
Important
The Hilscher Sycon Software Tool must not be used to change the IP address of the Gateway.