Warning
You are reading an old version of this documentation. If you want up-to-date information, please have a look at 2025.11 .Plugin installation and configuration
The plugin is delivered in a .zip folder. Unzip it and you will find the library and other elements.
Library_PluginSiemensProfinetAsycube.al15_1Several folders
The library contains the following elements

Fig. 196 Content of the library
Installation of the library
Click on Open global library to add an existing library to your project.
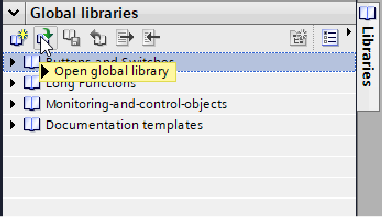
Fig. 197 Add library
Add the
Library_PluginSiemensProfinetAsycube.al15_1.
Add the Gateway in the configuration
Once your library is installed, expand the Master copies folder and drag and drop the Gateway configuration in the Devices & networks section. Should you have several Gateways, repeat this operation several times.
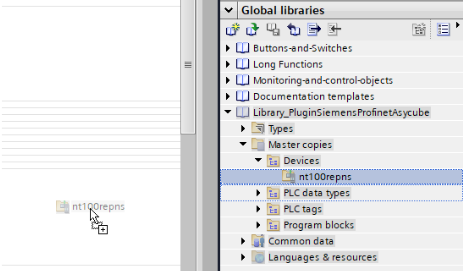
Fig. 198 Add Gateway configuration
Link the Gateway to desired network.
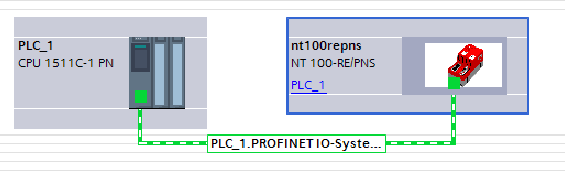
Fig. 199 Gateway linked
Import
HOLDING_REGISTER_READandHOLDING_REGISTER_WRITEstructures from the library to the PLC data types folder.
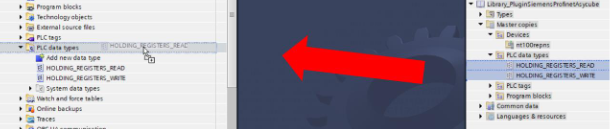
Fig. 200 Add PLC data types
Import the PLC Tags table Gateway from the library to the PLC Tags folder. Should you have several Gateways, import the tag many times.
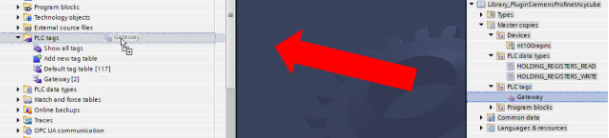
Fig. 201 Add the table of variables
Link I/O
In the device overview of the Gateway, you can find the list of inputs and outputs as well as their addressing. If needed, modify their addresses. Please make sure that they follow each other.
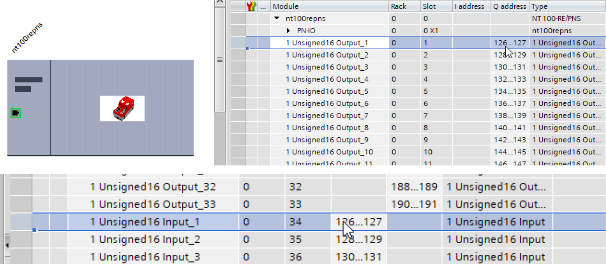
Fig. 202 Gateway addresses
Select the corresponding PLC Tag and modify the addresses of
regAsycubeReadandregAsycubeWriteso that they correspond respectively to the first input and the first output address of the Gateway.

Fig. 203 Variables for read and write registers
Connect the registers to the FB
Here is an example of an application with the input and output registers filled in. You must connect the PROFINET status register of the gateway to the input of each FB that you are using as well as the input and output registers of the Asycube.
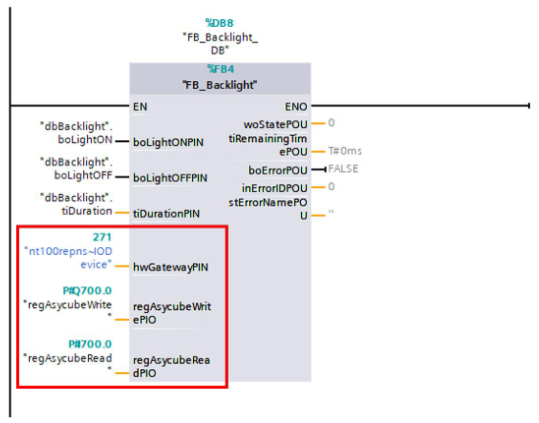
Fig. 204 Example of integration