Warning
You are reading an old version of this documentation. If you want up-to-date information, please have a look at 2025.11 .Replacing ball joints
Important
This section only concern the users of Asycube 380/530.
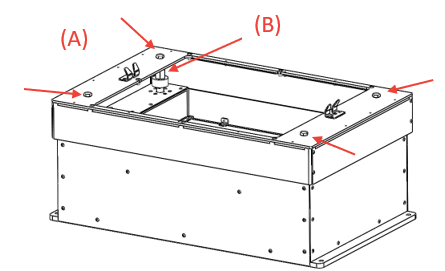
Step 1: Remove the platform and completely unscrew the 4 nuts (A) whilst holding the hexagonal extension (B) Use size 13 and 17 open-end wrenches
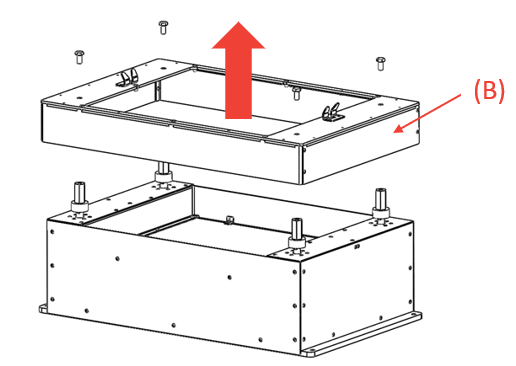
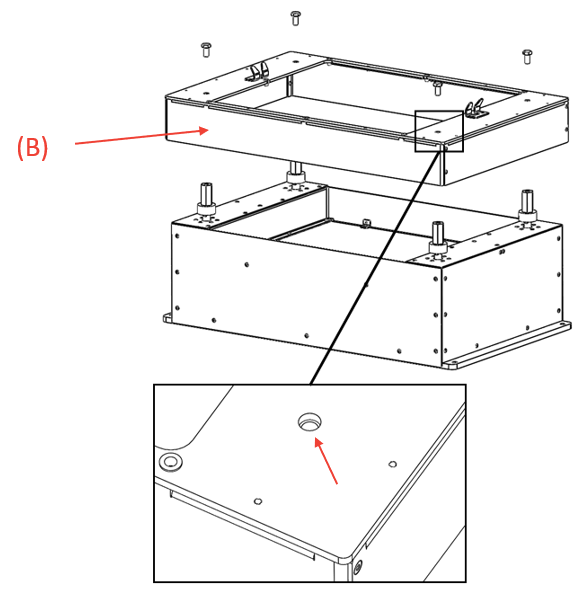
Step 2: Remove the upper assembly (B)
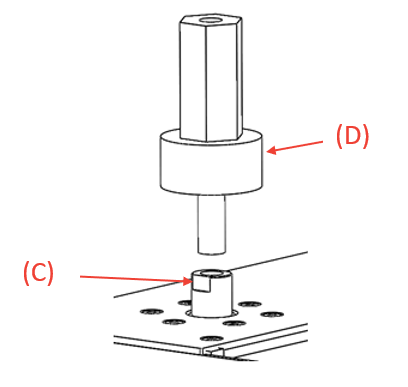
Step 3: Hold the axis (C) with a size 10 open-end wrench whilst you loosen the ball joint (D)
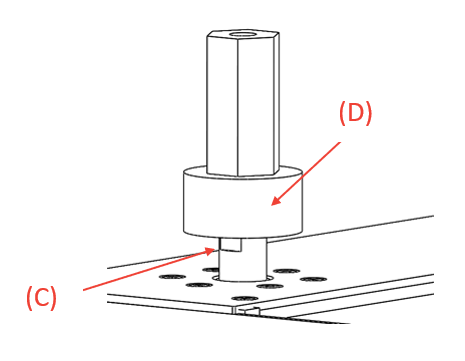
Step 4: Apply a drop of adhesive (type: Loctite 243 or similar) to the outer thread of the new ball joint. Securely tighten the new ball joint (D) BY HAND (do not use a tool) (mounting bush + extension), whilst maintaining the axis (C) with a size 10 open-end wrench
Step 5: Place the upper assembly (B) on the 4 ball joints and carefully align the holes opposite the threads
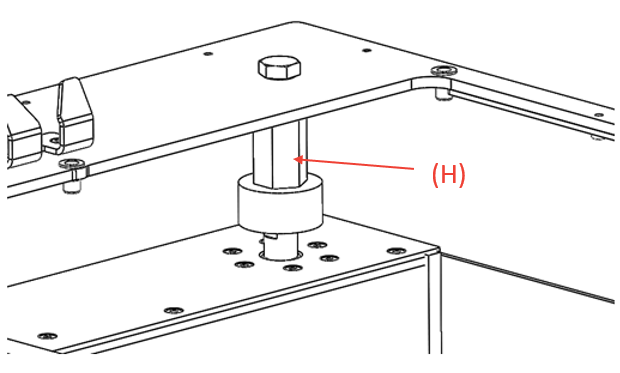
Step 6: Apply a drop of adhesive (type: Loctite 243 or similar) to the nuts Tighten (4.4 Nm) the four nuts WHILST HOLDING the hexagonal extension (H) with a size 17 open-end wrench