Warning
You are reading an old version of this documentation. If you want up-to-date information, please have a look at 2025.11 .Configuration
On the page (Fig. 105), you can get some information about the Asycube as well as set some settings. These settings are saved directly inside the Asycube and are valid for all recipes.
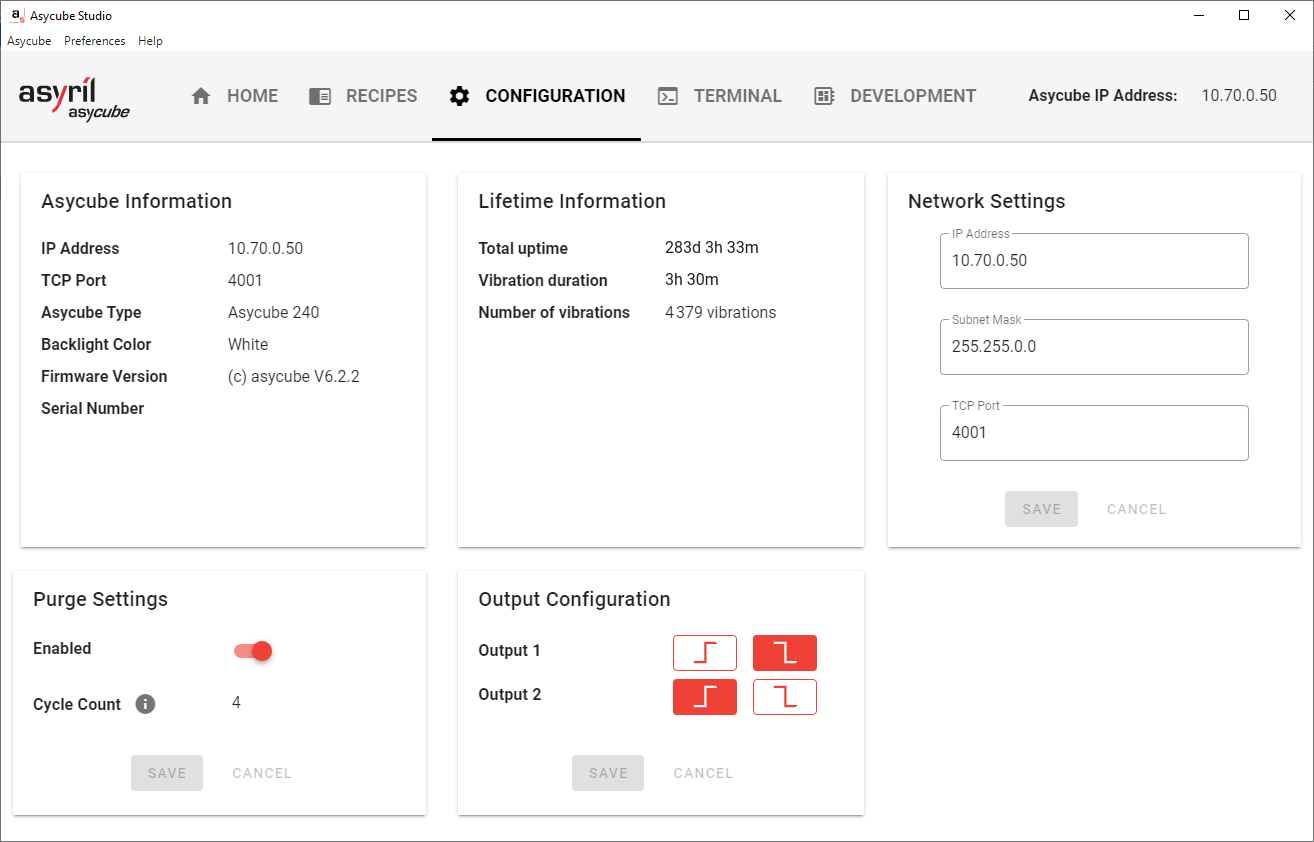
Fig. 105 Configuration page
Asycube Information
You can read here some general information about the Asycube, can be also read from the page.

Fig. 106 Configuration page - Asycube Information
Lifetime Information
This panel gives some statistics about the Asycube Lifetime.
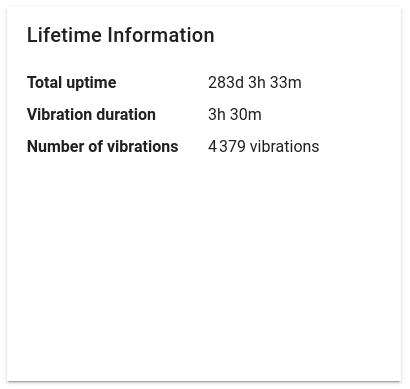
Fig. 107 Configuration page - Lifetime Information
Total uptime: Total amount of time the Asycube was powered on
Vibration duration: Total time the Asycube vibrated
Number of vibration: Number of vibrations triggered by the Asycube
Network Settings
You can change here the IP address and TCP Port of the Asycube.
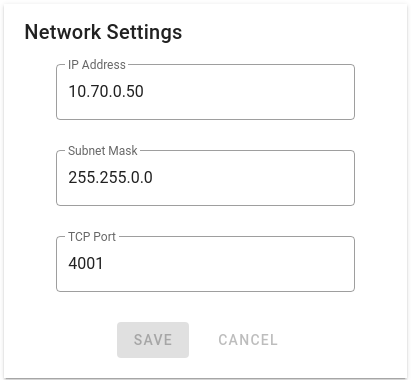
Fig. 108 Configuration page - Network Settings
Before changing the parameters, Asycube Studio will ask for a confirmation as this will disconnect the Asycube.
After the change is effective, Asycube Studio will switch to unconnected mode and you will be able to connect to the new address.
Note
Depending on the new IP address you chose, you will have to modify the IP address of your computer, see How to change the IP Address on your Windows PC? if you need help doing that.
Purge Settings
This allow you to enable the purge option when the purge mechanism is installed (see Purging platforms).
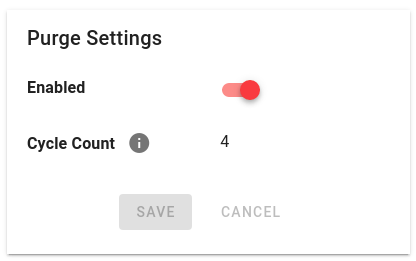
Fig. 109 Configuration page - Purge Settings
Enable the purge by toggling the button and click on to write the change into the Asycube. This will allow you to open/close the purge as well as add some purge actions into the vibration sequence in the recipe.
Important
Do not enable the purge option when the purge mechanism is not installed. This could prevent the Asycube from working properly.
Important
Do not forget to enable the purge option when the purge mechanism is installed. Failing to do so could damage the Asycube.
Note
Once the purge is enabled, the cycle count will be displayed. Monitor this value as we recommend to change the actuator when this reaches 20 000 cycles.
Output Configuration
Asycube 240, 380 and 530 have digital outputs and the logic of these outputs can be configured.
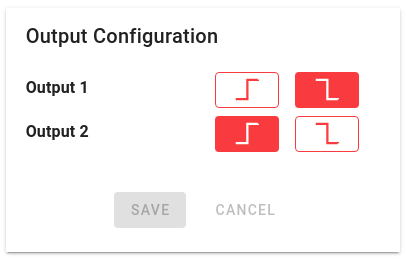
Fig. 110 Configuration page - Output Configuration
 Positive Logic: The output changes from 0V to 24V when activated
 Negative Logic: The output changes from 24V to 0V when activated