Warning
You are reading an old version of this documentation. If you want up-to-date information, please have a look at 2025.11 .Exchanging / Installing the backlight
Important
Be sure that all power sources and other cables to the unit are disconnected before changing the backlight.
Material needed :
New backlight assembly delivered by Asyril
Flat wrench size 5.5
Torx key size 10
Step 1: Remove the platform module (A)
Step 2: Remove the four screws (B)
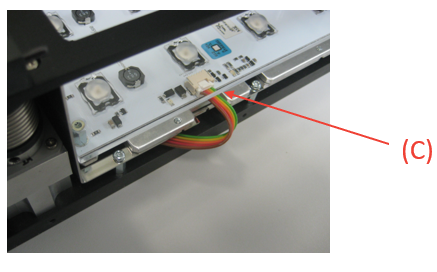
Step 3: Unplug the backlight connector. (C)
Step 4: Place the new backlight
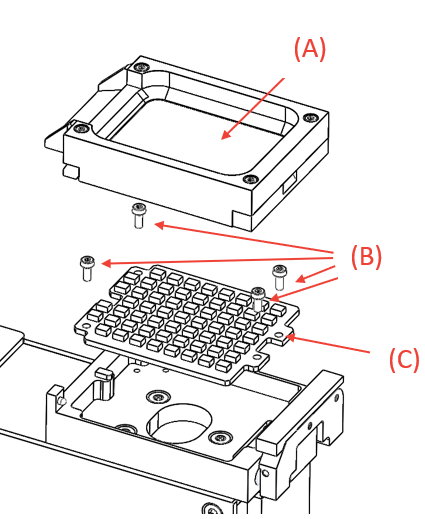
Step 5: Screw the four screws (0.2 Nm)
Step 6: Remount the platform module
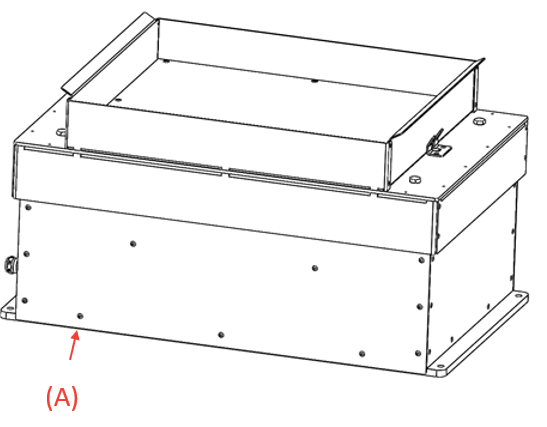
Step 1: Unscrew the 7 screws on both sides (A) and (A’) and remove the two side covers.
Use an torx key size 10 
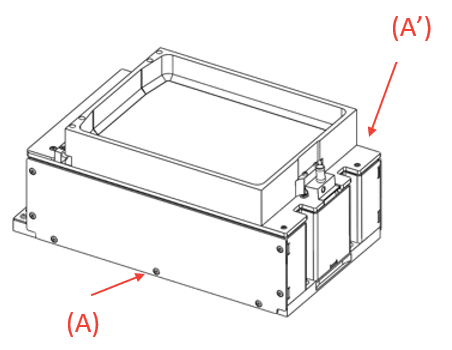
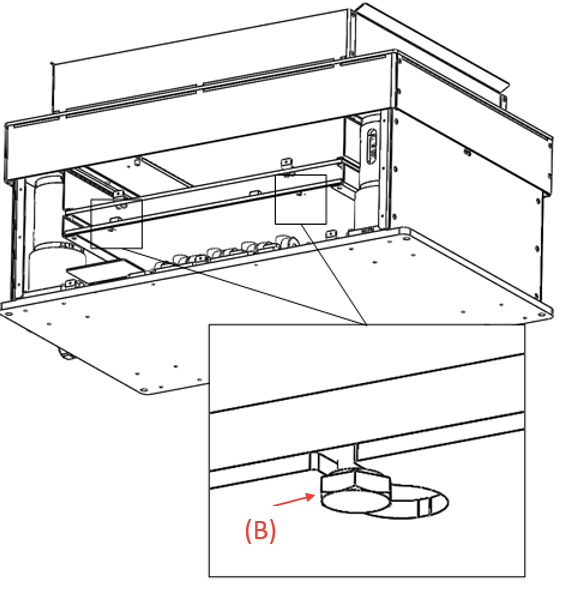
Step 2: On both sides, unscrew the four bolts. (B)
Use a flat wrench size 5.5 
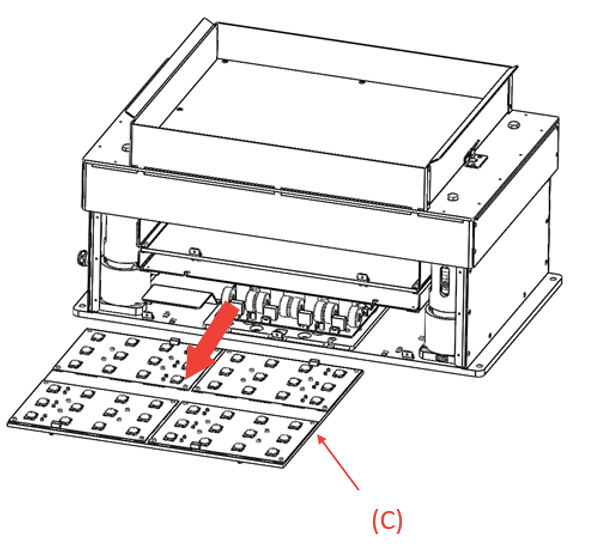
Step 3: Unplug the backlight connector. (C)
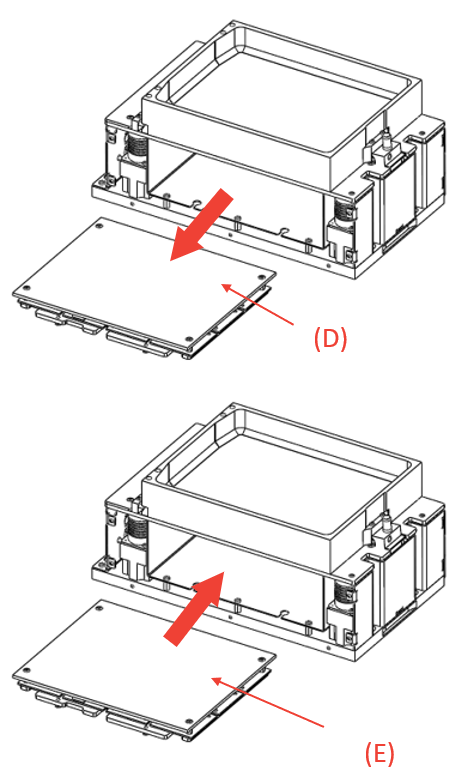
Step 4: Remove the old backlight (D) and insert the new backlight. (E)
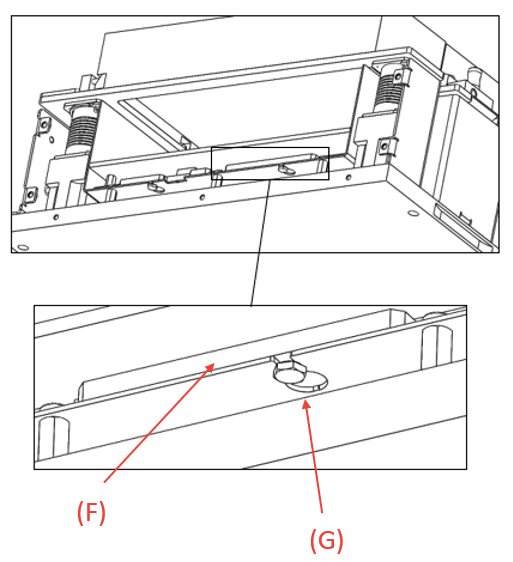
Step 5: Align the backlight module flush with the mirror support (F) and tighten the four bolts. (G)
Use a flat wrench size 5.5 
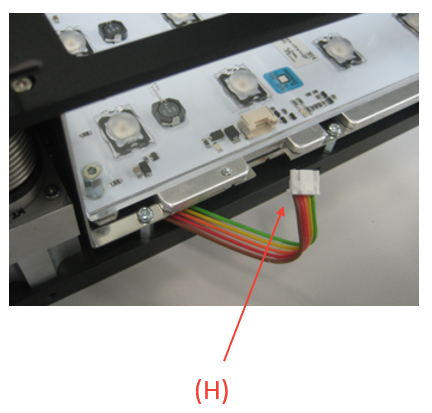
Step 6: Plug the backlight connector. (H)
Step 7: Remount the covers (I) and (I’) on both sides.
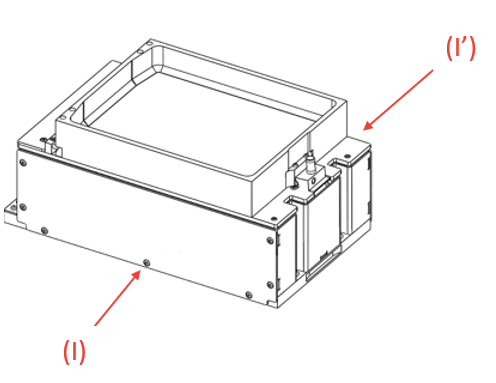
Step 1: Unscrew the screws on both sides (A) and remove the two side covers
Use a torx key size 10 
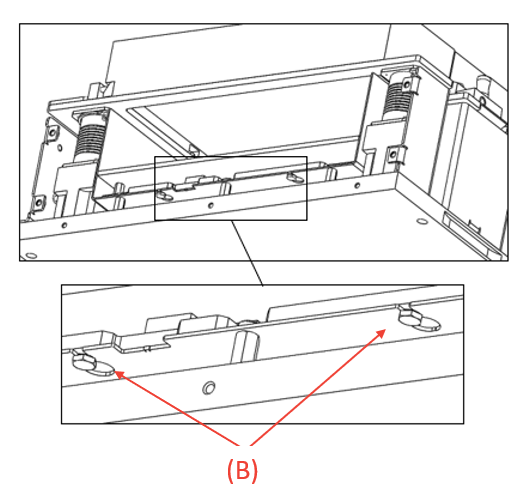
Step 2: On both sides, unscrew the four bolts (B)
Use a flat wrench size 5.5 
Step 3: Carefully disconnect the connectors from the electronics Remove the old backlight assembly (C)
Step 4: Insert the new backlight assembly (D) and align it with the support
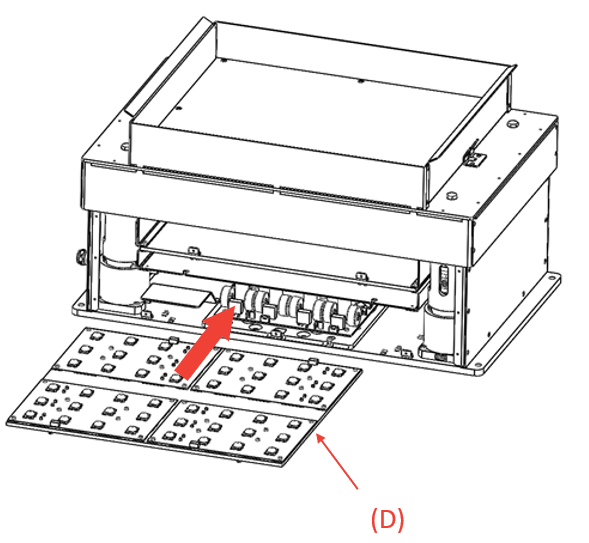
Step 5: Tighten the four bolts (E)
Use a flat wrench size 5.5 
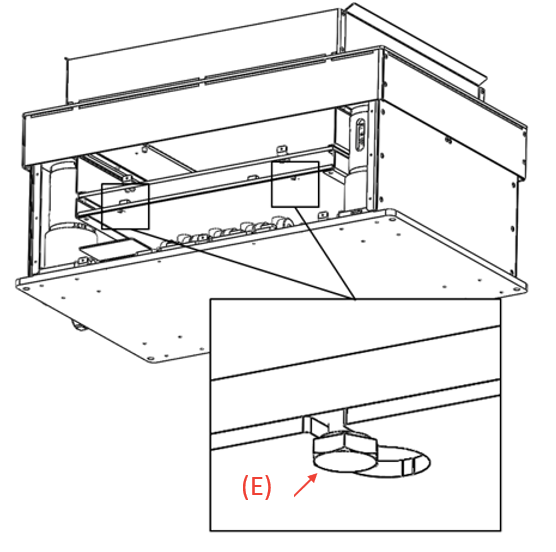
Step 6: Connect the connectors to the electronics
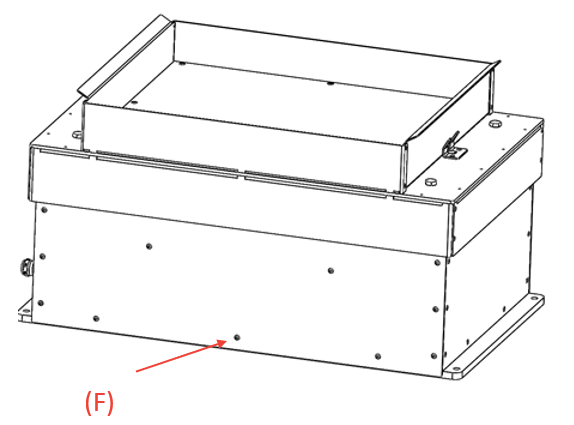
Step 7: Refit the covers (F) on both sides and tighten the screws on both sides
