警告
これは、古いバージョンのドキュメントです。 最新の情報をご覧になりたい場合は、次をご覧ください 2025.11 .Gateway connection
電源接続
Connect the 24VDC (130 mA) power supply on the naked plug provided with the Gateway

図 170 Gateway power supply
Asycube connection
Connect the Gateway X3 port to the Asycube communication port with a RJ45 cable. ( See 図 171) The Asycube feeder MUST have its IP Address set to its default value 192.168.127.254. The IP Address of the Gateway X3 port is 192.168.127.1

図 171 Gateway ethernet connection
PLC connection
Connect the Gateway X2-IN port to the machine controller Ethernet-based fieldbus port with a RJ45 cable ( See 図 171). The IP Address of the Gateway X2-IN port is set to 192.168.127.254 and cannot be changed.
Power ON
Switch the power supply ON to supply both the Asycube and the Gateway. Check the status of the Gateway LEDs:
SYS: steady green ON.
APL: blinking green with 2s OFF and 0.5s ON or steady green ON (if the machine controller runs).
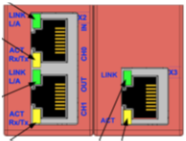
X2 LINK IN (CH0) L/A: steady green or blinking green.
X3 LINK: steady green.
Other LEDs may also switch on or blink.

図 172 Gateway Overview