Avertissement
Vous lisez une ancienne version de cette documentation. Si vous souhaitez obtenir des informations actualisées, veuillez consulter 2025.11 .Plugin installation and configuration
The plugin is delivered in a .zip folder. Unzip it and you will find the library.
Library_PluginMitsubishiCCLinkAsycube(iQ-R).uslLibrary_PluginMitsubishiCCLinkAsycube(iQ-F).uslSYCON project to modify the transmission speed (Baud rate) of the Gateway see Change the transmission speed (Baud rate) of the gateway (Optional) (in the folder Gateway Configuration)
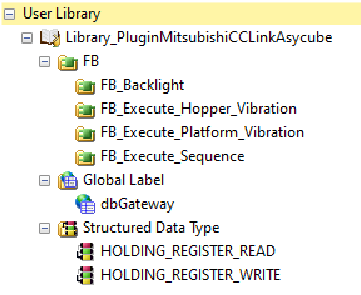
Fig. 127 Content of the library
Installation of the library
Click on Project > Library Operation > Register to library List > User Library..
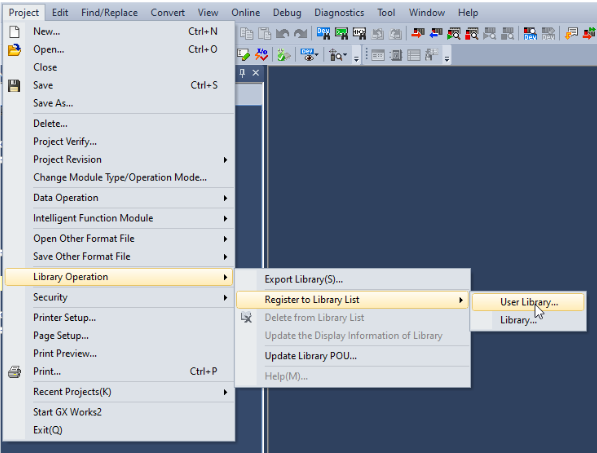
Fig. 128 Import a Library
Add the
Library_PluginMitsubishiCCLinkAsycube.usl.
Add the register file
Add the holding registers to Structured Data Types of your project.
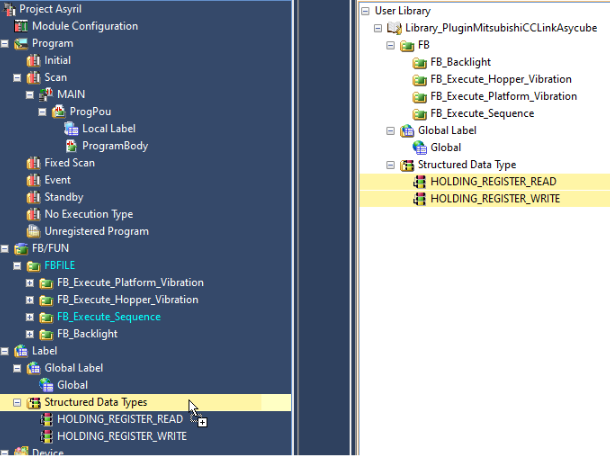
Fig. 129 Add
Structured Data Types
Add the
dbGatewayto Global Label of your project. Should you have several Asycube, you can simply duplicate this label or its content. If GX Works 3 asks you to overwrite the registry files, because they are already present, select Yes.
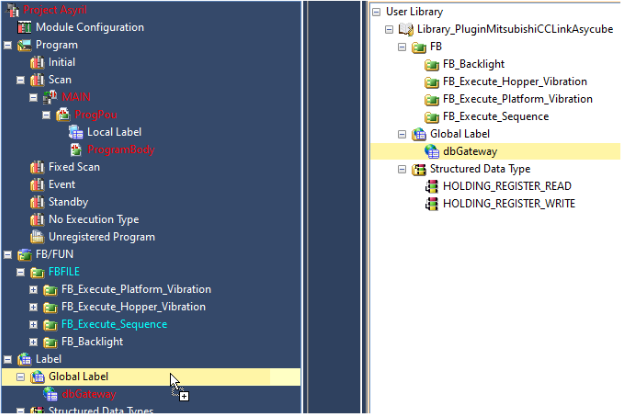
Fig. 130 Add Global Label
Add the Gateways in the configuration
Configure your CC-Link module > Required Settings according to below parameters. The default transmission speed of the Asycube Gateway is 10Mbps. Should you want to change it please refer to Change the transmission speed (Baud rate) of the gateway (Optional).
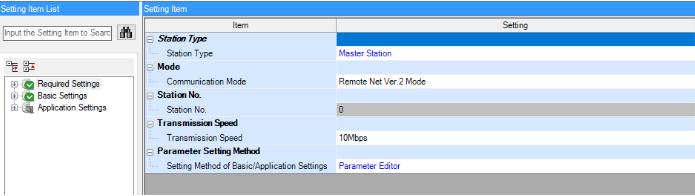
Fig. 131 Required Settings
On your CC-Link module > Basic Settings, click on Network Configuration Setting.
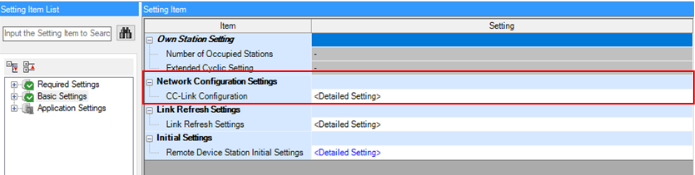
Fig. 132 Basic Settings
Set the Mode Setting to Ver. 2 Mode and verify the TX Speed. Click on Detect Now.
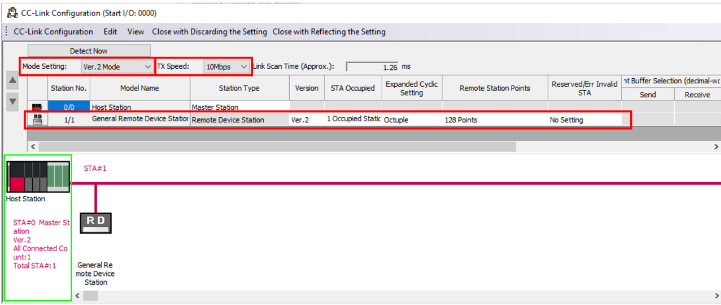
Fig. 133 CC-Link Configuration I/O
You should now see all the remote station (one per Gateway/Asycube).
Check that the parameters are as in Fig. 133.
Click on Close with Reflecting the Setting.
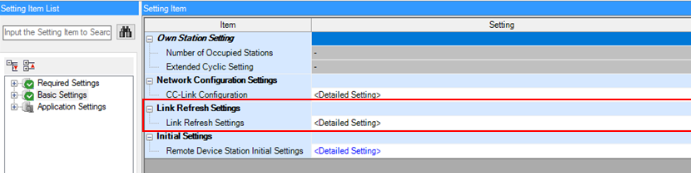
On your CC-Link module > Basic Settings, click to Link Refresh Settings.
Link I/O
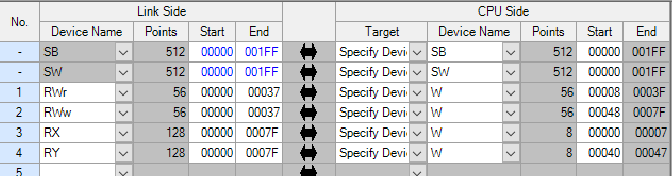
Once the gateway has been successfully integrated into your project, you must assign the registers (data) of the Gateway in the Global Label.
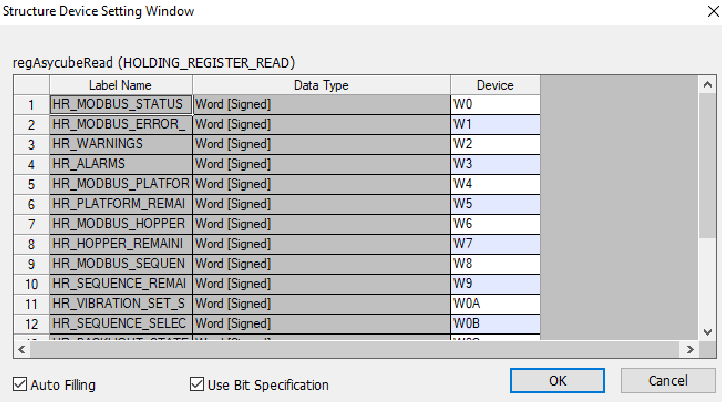
Select the
dbGatewayLabel.Click on Detailed Setting of
regAsycubeRead.

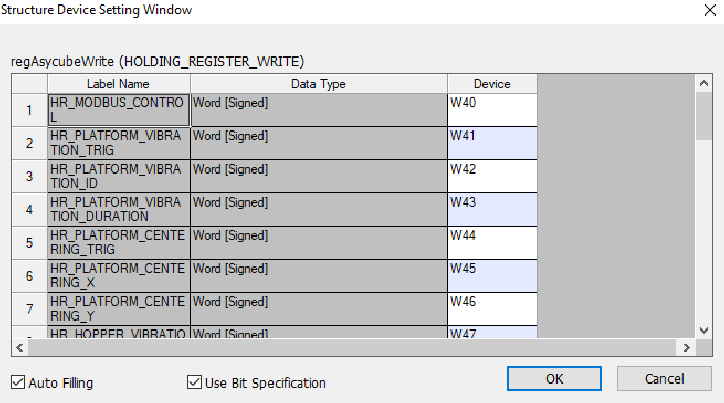
Connect the registers to the FB
You must use the register variables instantiated in the global variables (regAsycubeWrite and regAsycubeRead) at
the input of the different blocks. The variable boConnectionFaultedSB must also be set using the station status
variable of your device (1 = remote device disconnected, 0 = normally situation).
Here is an example of an application with the input and output registers filled in.
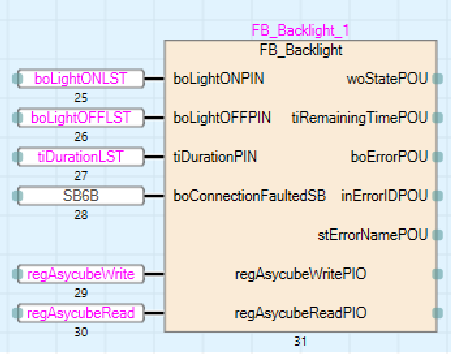
Fig. 139 Example of integration
Change the transmission speed (Baud rate) of the gateway (Optional)
The default Baud rate may not be suitable for all application. If you need to modify the Baud rate, please follow this procedure:
Download the Hilscher SYCON.net software tool.
Install the Hilscher SYCON.net software tool.
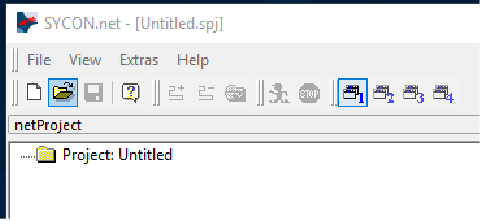
Launch the Hilscher SYCON.net software tool: click OK without Password.
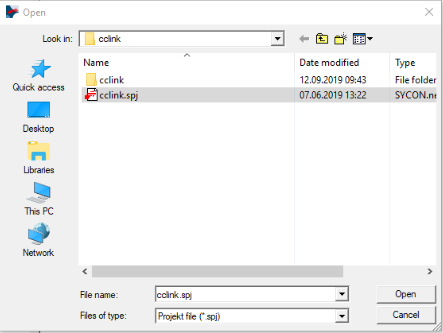
Open the
cclinkproject provided with the plugin.
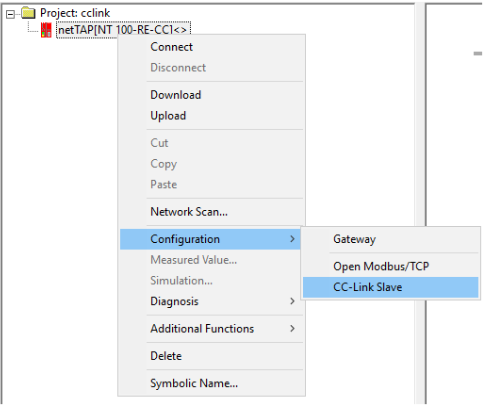
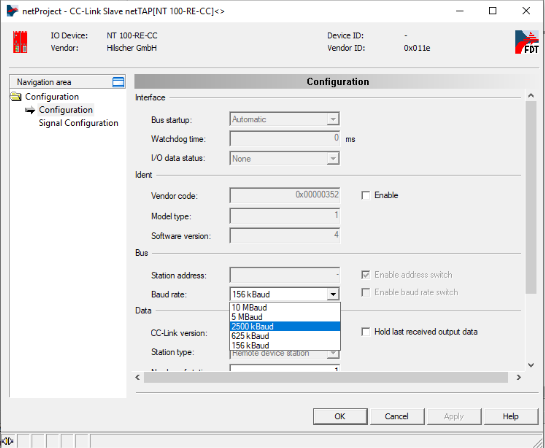
Modify the Baud rate.
Connect your Asycube CC-Link Gateway to your computer.
Connect the 24VDC power supply (Connexion de l’alimentation électrique)
Connect the provided USB cable to your Gateway (under the flap).
Connect the provided USB cable to your computer.
Download the configuration into your Gateway.
Right-click on the
netTAPitem.Click Download.
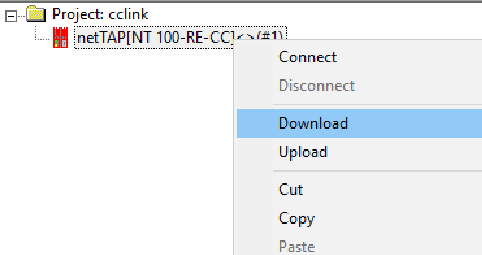
Fig. 144 Download the configuration into the Gateway
If you get a warning Do you really want to download?, click Yes.
Wait a few seconds until the download succeed.
Finalize.
Exit SYCON.net software tool.
Remove the USB cable.
Disconnect the power supply.